Finding rusty old junk is fun! Nevertheless, I have found that no matter how much "stuff" I find and collect, only God can fully satisfy my heart. Matthew 6:19 Lay not up for yourselves treasures upon earth, where moth and rust doth corrupt, and where thieves break through and steal:20 But lay up for yourselves treasures in heaven, where neither moth nor rust doth corrupt, and where thieves do not break through nor steal:21 For where your treasure is, there will your heart be also.

Thursday, October 27, 2011

"Pretty-Creepy"Halloween Mantel Reveal

Update 2013: Its Halloween again! I am linking up 2011's post to all the great fall parties for those of you who didn't get a chance to see it. Enjoy!

Halloween 2011
Well I have been waiting since mid-September for this reveal and here it is...


As far as I know, there is not another display quite like this one anywhere. I decided to go with a "bone-chilling" theme after purchasing some skeleton decorations at the dollar tree and a small skeleton at a yard sale. I used some of the potions I had made last year and I incorporated some doll heads along with an old limbless composite doll that I dug out of the bottom of an estate sale throw-away box this summer. I think that regardless of the fact that its quite creepy, the use of antique dishes, knick-knacks (like a large "skeleton" key and antique doorknobs from some old victorian home), along with vintage bottles, and doll parts keeps it pretty somehow. I call this display,"pretty-creepy!"


I got the inspiration for this year's mantel from these dollar tree
decorations and decided to frame them to create a theme.  I used frames I already had. I just removed the lighthouse prints  and covered the cardboard backing using tea-stained muslin and creepy cloth.


The skeleton is holding an early 1900's partial baby doll wrapped in cheesecloth that resembles a baby mummy, and a homemade bottle of "Tincture of Mummy Wrappings." I love the dollar store mini-skeleton I cut off a garland and placed on a vintage looking bicycle.
Love all the creepy crazing on the doll. Its soooo old!
Macabe, I know...  but still, its "pretty-creepy"


I stuck this $1 craft witch doll head on the top of
my Witch's Brew  

The "Shrinking Elixer" is one of my original potions. I placed another mini-skeleton in vegetable oil in the large bottle. I found an image from an old movie of a man being attacked by a giant spider, and decided it would make a great shrinking potion label. The other bottle holds garlic powder with a few skeleton parts sticking out. I called it, "Bone of Gnome" (using only the finest ground bones since 1637)


 This is how the fireplace scene looked for a few weeks, but there have been a few changes since since this picture was taken.
Everyone loves the skeleton holding the antique toys and vintage postcard garland (I moved him to a different spot for Trick-or-Treat).
I recently blogged about the skeleton and his little antique toy clown that I made over to look like a vintage Halloween toy:http://junkaholicsunanimous.blogspot.com/2011/10/creepy-antique-toy-clown-halloween.html


I added the old horror film posters that I found for $1 at a yard sale and the black sleeping cat ( a .25 yard sale find). The paper black cat sitting by the fire was another decoration in the same package as the skulls I used to make the mantel pictures. It looks so real when the lights are low! I finally found my small cast iron cauldrons that have had me searching high and low all fall. They are filled with chocolate eyeballs and plastic skulls.


Since I never repeat the same mantel theme each year, I think I have my work cut out for me for next year! Nevertheless, that's the thrill of the hunt! Its all the things I find as I'm junkin' throughout the year that will evolve into ideas for next Halloween's display and that's what makes it so fun. I have enjoyed sharing my ideas with you. (If you choose to use these ideas or post these pictures that would be wonderful, just don't forget to post a link back to this post and my blog). I love new comments, followers, and friends!

Trick-or-Treat! Hope your Halloween is "pretty-creepy" too!

For more Halloween and fall decorating ideas, check out my older post:http://junkaholicsunanimous.blogspot.com/2011/09/fabulous-fall.html


Wednesday, October 26, 2011

White Wednesday Oct. 26th, 2011 Hoot!

For White Wednesday I am sharing another easy way to use an old white window for Halloween decorating.
To start, here is the a wreath I bought this summer at a yard sale for $2.00. I liked it but it didn't really stand out anywhere I put it, so I decided it needed a makeover.

Good old spray paint to the rescue!

I used glossy black. I still wasn't exactly sure what else I was going to do with it at this point.

Then I thought about this awesome vintage owl blow mold I found a few weeks back at the flea market for  $1...


and the other long white window I hadn't used, and before long I had an easy, adorable wreath and Halloween display.


I simply hung the wreath on the window using a suction cup, stuck the owl in the center of the wreath and camoflauged the cord as best I could, and then draped some black creepy cloth over the back of the window. Total cost of the display is $6 since I already had the spray paint. 


Happy White Wednesday. Hope your Halloween is a hoot! (Sorry, couldn't resist!)

Linking Up to White Wednesday at http://www.fadedcharm.blogspot.com

Monday, October 24, 2011

Creepy Antique Toy Clown Halloween Makeover, October 24th


When I saw this very creepy vintage toy clown at an estate sale in May, I immediately grabbed him. Now I am not sure why, because I have always been creeped out by clowns. But I guess since it was an old toy for a $1 I figured I could just sell it on Etsy if nothing else, and I hardly ever pass on old toys. By the time I got home however, an idea had popped in my head. I decided he would also make a great Halloween decoration, even though he was pink and blue.  Unfortunately I already started painting him when I realized I had forgotten to get a before shot, but you can tell what he looked liked from the back of his head.


Here you see what kind of cruddy shape he was in.

 I started by painting one side black with acrylic paint.


I painted the other side a burnt orange (In the future I might try a different type of paint on a similar project, as acrylic peels easily off the old oil cloth material as you can see the little bits of pink on the leg where the black scraped off)


For dressing him up gathered up some misc. craft supplies I already had. I used some leftover black tinsel ribbon I had bought last year for .25 after Christmas at Hobby Lobby. I purchased a roll of orange glittery ribbon and a little girl's feather hair accessory and a pumpkin charm all for $4 this year at H.L. to use as well.


I used hot glue to attach the glitter ribbon and feather hair accessory. I gave him a bigger clown mouth and touched up his cheeks and nose with red and black sharpies. I touched up the orange and black paint later. I gave him the large pumpkin charm as a Trick-Or-Treat bucket, and after that he was all ready for Halloween!


And now he is proudly on display by the fireplace where Mr. Bones ($2, yard sale) seems to enjoy playing with him and the antique clown noisemaker----CREEPY! I used the vintage postcard tinsel garland on my mantel last year, but this year it is being repurposed as a skeleton's scarf. I am really pleased with how this display turned out!

Total clown project was only $6 since I used some paint and materials I already had. Not bad for a one-of-a-kind vintage "Halloween" toy decoration!


Happy Halloween!


Linking up to:

Saturday, October 8, 2011

Fall Porch and Garden Decorating


 So far it has been a very rainy and unseasonably cool fall, but at least this week the weather cooperated long enough to get the outside decorating going.  I was so excited to finally get to use some of the new (old) things from the flea market and summer yard sales on our porch and landscape for fall decorating.

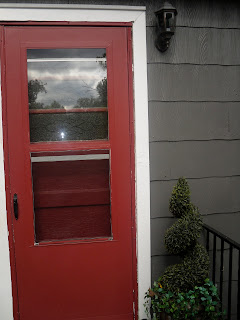
 Here is the before:


I started by taking everything off the porch

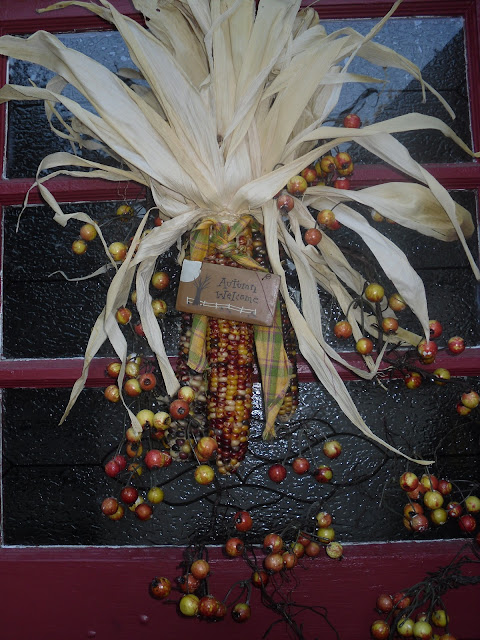
I added an indian corn and autumn berries spray to the front door. I like to use indian corn each year because its appropriate from August through Thanksgiving. This year I added the berries to dress it up.

Then I added the usuals--mums and pumpkins and some fodder shocks (cornstalks)...

And a little red wagon...

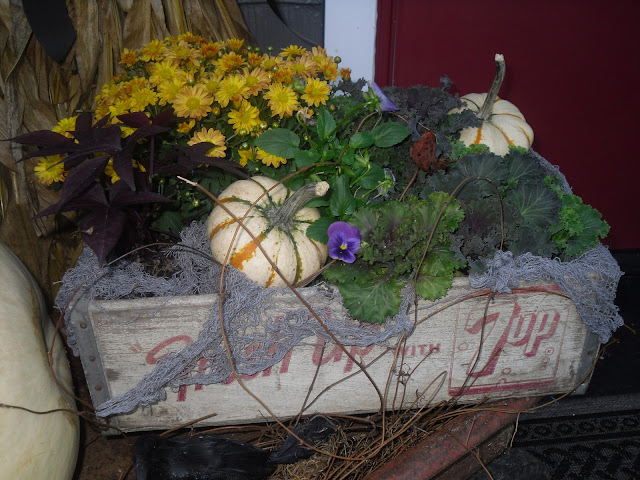
 We'd had this vintage Radio Flyer wagon sitting in the basement since we brought it home from the flea market earlier this summer. With all that rust  I knew it would look very "fallish" and would be perfect to load up with lots of fall goodies. I used some grapevine, striped mini-pumpkins, and that big ol' ghostie, along with  an old 7-up crate stuffed with autumn kale, mums, sweet potato vine, pansies and more white and orange striped pumpkins. The white ghost pumpkins are a good choice for our house because they seem to really pop out against our dark gray siding.

I found the 7-up crate last weekend for $3 at the flea-market. We have started to acquire quite a collection of soda crates but I think this one may be my favorite because its white, which I have never seen so I couldn't pass it up. I think it will look great filled with vintage Christmas ornaments too, but that's another post!

After Thanksgiving I plan to bring the crate in and add it to our collection so I definitely don't want it to get ruined during fall. We don't have a covered porch so when it rains I just stick an umbrella over it. I lined the inside with a large Turkey roasting bag to give it a little waterproofing and I kept all the plants in their original plastic pots to protect the crate as much as possible.


My husband wondered what I had planned to do with the fireplace surround when we bought it at a yard sale for $10. To be honest, I didn't know exactly where it was going either but I knew I'd find a spot and as we junkers know, when something speaks to us, we buy it and there doesn't always have to be any real logic to it. So anyway, when we got home that day and started unloading our junk finds on the porch, I realized it would look great right there (for summer I had a large, vintage red and white enamelware pot filled with flowers sitting where the canning pot is now.)

I have talked a little about that spooky rocking chair in my 31 days of Halloween post. We found the chair at a yard sale for $10. The lady who previously owned it had purchased it at an auction so who knows where it came from or who or what had rocked in it before. We had it in the basement but every time my husband walked past it he got a little unnerved so I stuck it on the porch for a Halloween decoration. I have to admit,  it truly is creepy...

Our early 1940's cottage is very unique, especially the way the porch was designed with three separate landings and two sets of stairs. It can be a challenge to pull it the decorating scheme all together cohesively without it looking repetitive but that keeps things interesting and fun for me to decorate. Here is the first set of stairs which leads to a landing and onto a garden path under the large picture window where my window box is now dressed for Halloween.


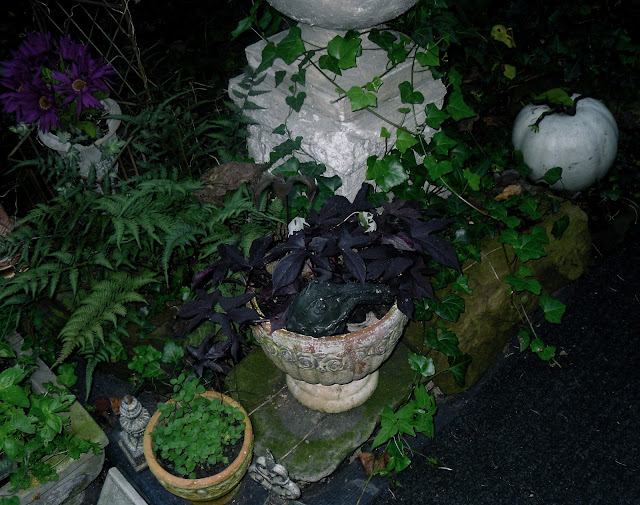
The second set of stairs turns and leads to two more landings. This little section is my favorite with all the plants, urns and garden ornaments 

This is a picture from 2010, where I lined the stairs with Lumina (ghost pumpkins).
I wasn't able to find enough decent ghost pumpkins
this year so I decided use blue and green
pumpkins and gourds along with traditional oranges instead.

The view from the driveway
The large cinderblock wall was a real eyesore when we purchased the home three years ago. (None of the plants or urns in this picture were here and grass did not grow due to heavy shade.) The large wall, porch and siding were all painted a light blue-gray and all the paint was chipping ( Regardless of my love of chipping paint, it did not look shabby chic---it looked skanky chick, and so the look had to go...) The wall still looked pretty blah until we found the old tin crown molding at the flea market and made a planter out of it. It added a lot of charm to the walkway and everyone seems to love it.
http://junkaholicsunanimous.blogspot.com/2011/10/salvaged-antique-crown-molding-planter.html


One giant pumpkin is all that is needed to add fall to this part of the porch
This year's Great Pumpkin is "only" 80 lbs

Love this warty pumpkin in our mossy celtic pot, very magical

This year the porch walk seemed to take on its own magical color scheme with purples, blue-gray tones, and mossy greens. A frog hopped out of a witch's brewing cauldron just in the nick of time and is recouping on the bluish-white pumpkin in the garden.

This spooky owl ($1 yard sale) is perched and waiting for that frog to hop around the corner...


(If you enjoyed this post, be sure to check out http://junkaholicsunanimous.blogspot.com/2011/09/fabulous-fall.html to see more of my fall garden decorating.)

Linking up to: http://fishtailcottage.blogspot.com/search/label/Outdoor%20Fall%20Decor